
When you’re sailing, skin fittings and ball valves are usually far from your mind until they start leaking, or worse: break off. How do you replace a skin fitting or a ball valve? What is best: brass, bronze or a composite material? A step-by-step guide.
This article is made in cooperation with Rosch Marine:
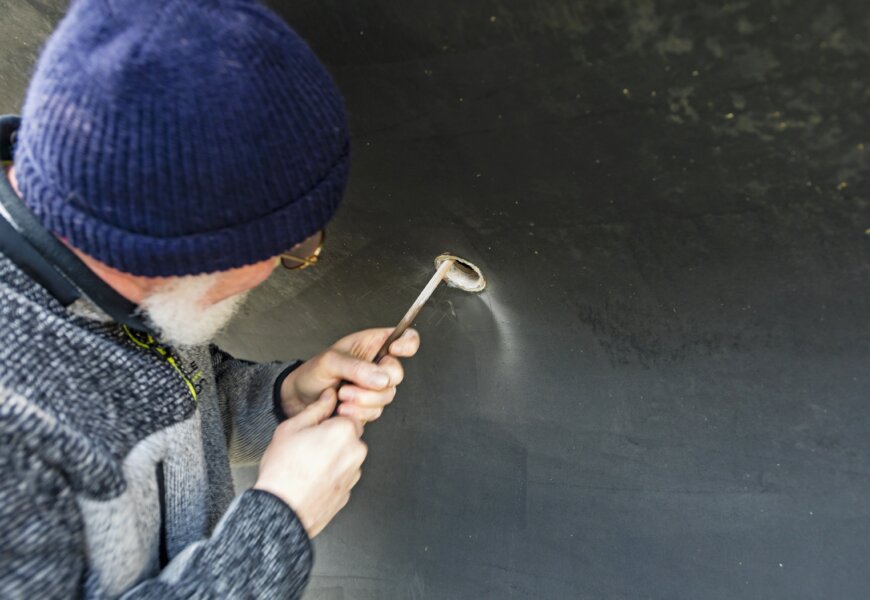
Do you dare to do it yourself: replacing a skin fitting or a ball valve on your yacht? Dutch yacht owner Rudolf de Laat does. His 1989 Hallberg Rassy 42 is on the hard; we find him working under the hull. He is using a piece of discarded old prop shaft to get a skin fitting out: the metal rod is inserted through the hull. It has already been ground off, but it takes some beating with a large hammer on the prop shaft to tap out the skin fitting through the tick, massive GRP laminate. “Eventually, I’ll win” he laughs. Rudolf has decided to replace all skin fittings and accompanying ball valves with TruDesign composite ones. Together with the team at Rosch Marine, the Dutch distributor of the brand, he has made an elaborate plan. All components are ready at hand. “With the elaborate step by step installation guide, I’m confident that I can do this.”
Due to replace
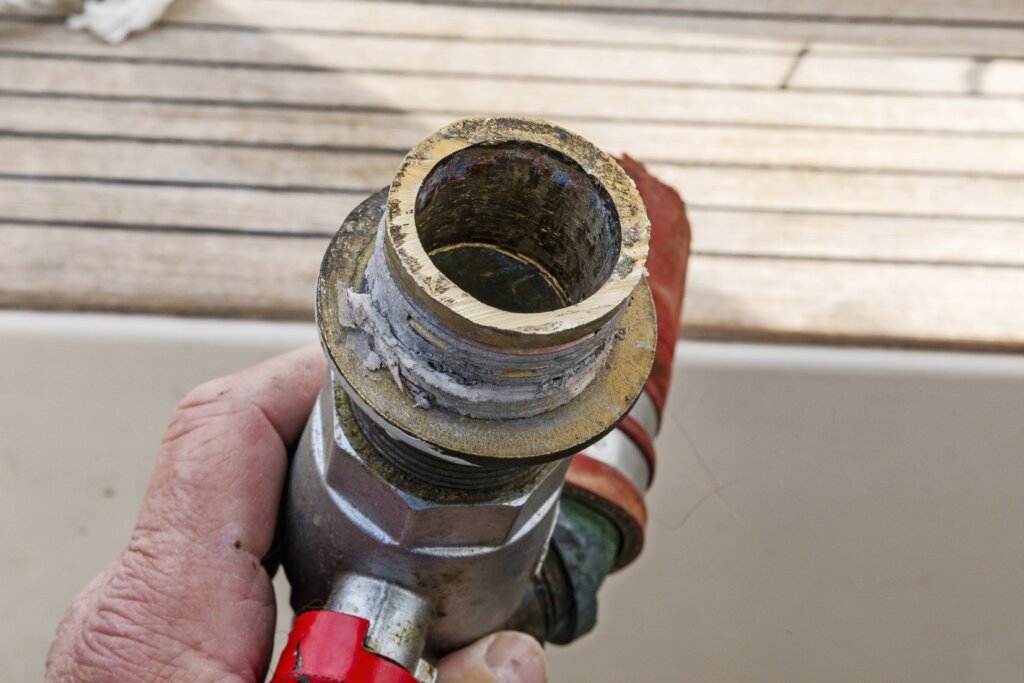
After climbing his ladder three meters up to the cockpit, Rudolf shows us his first ‘trophy’: “this brass ball valve fell apart while I was taking it off. 34 years of use have left their trace: do you see how thin the walls of the ball valve are, caused by corrosion? Do you see the copper-coloured crack? It shows that the brass has suffered from dezincification. That is one of the reasons that I have chosen for composite material: I don’t want to worry about corrosion in ball valves or skin fittings. The Trudesign products are more expensive than similar skin fittings and valves made of zinc-laminated or DZR brass, but they are cheaper than the same products in bronze.”
Immune to corrosion
Trudesign is based in New Zealand and has been making composite skin fittings and ball valves for the maritime industry. Rosch Marine is the distributor in the Netherlands. Their products are IMCI, ISO 9093-2, ABYC H-27 and Bureau Veritas certified, in compliance with all maritime regulations. The composite material of the valve housing is made of glass fibre reinforced Nylon 6/6. The seals are made of neoprene rubber, the holder itself is made of PTFE, a material related to the non-stick coating on a frying pan. No dirt or marine growth will attach itself to it, so the valve will always open and close smoothly. Water provides necessary lubrication.
Composite material is slightly flexible, so the risk of damage in freezing conditions are less. The strength of the composite is comparable to similar products made out of metal. For extra strength, Thru-design developed a load-bearing collar which reinforces the connection between skin fitting, ball valve and hull. This product has been awarded the Dame Award, a prestigious award in the maritime industry. The big advantage of composite skin fittings and ball valves is their immunity for galvanic corrosion, the big threat to skin fittings and ball valves of metal alloys. Especially for aluminium yachts, corrosion through electrolysis is always a concern. Therefore, new-build aluminium yachts are fitted with composite skin fittings and ball valves.
Remove the old skin fitting
Rudolf uses his angle grinder to remove the old skin fitting: he is a dentist, so with a firm, though very steady hand he grinds the brass flange off until the gelcoat is almost visible. “Ready to now use some brute force to tap it through into the boat; make sure to clear obstructions inside.” Using a drill to remove the skin fitting is another method: force a wooden peg into the skin fitting and saw it off exactly along the outside of the skin fitting. Mark the exact middle of the peg. Use a hole saw in the exact diameter of the skin fitting and drill it out. Professionals prefer this method. After Rudolf has removed the old skin fitting, he thoroughly cleans the hole with a multitool. “I grind it to a very smooth finish, until I get to the laminate, inside as well as around it” he explains. The hole is now ready for the new composite skin fitting.
Measuring and testing
Before the new skin fitting and ball valve are installed, Rudolf completes a dry run of the installation. “The handle of the ball valve usually needs to operate in a specific direction, so it pays to find out which position the skin fitting needs to have with the ball valve and especially with the load bearing collar attached to it.” He explains: “to avoid leakages it is very important that the thread of the skin fitting is mounted into the ball valve no less than three centimetres. When you use the load bearing collar, the ball valve will push the collar against the hull, which gives it extra support. But still: you need those three centimetres of skin fitting inside the ball valve. This means that you will have to cut the length of thread of the skin fitting to size. I proceed with a dry run of the installation without sealant. When the ball valve and the handle are in the right position and threaded in correctly, I mark the position of the ball valve and skin fitting relative to the hull with a bit of masking tape.”

Installing the composite skin fitting
Prior to the definitive installation of the skin fitting, the hole and the hull around it, plus the skin fitting, need to be degreased thoroughly. To seal it, Rudolf uses a polyurethane sealant such as Sikaflex 291 and Bostik 920. “I make a ‘caterpillar’ of sealant on the flange of the ball valve and on the thread, measured to the thickness of the hull. With the marked masking tape as a guide, I push the skin fitting in the right position through the hull. With the Trudesign special installation tool I can install the skin fitting easily by myself. Just to be sure, I temporarily fixate the skin fitting to the hull using a bit of tape. From the inside I tighten the nut and the ring by hand and proceed with permanently fixating the skin fitting firmly with the installation tool. When the sealant has cured, the nut is tightened to 20 Newton metre.
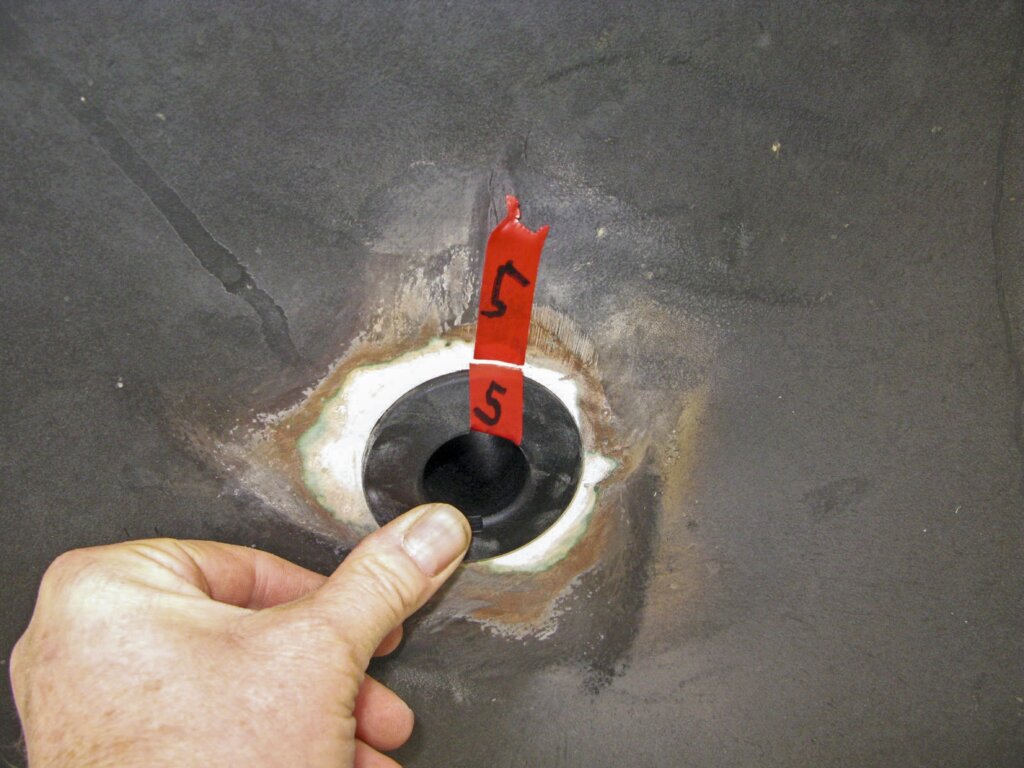
With a piece of tape, you can mark the position of the
skin fitting in the hull. This is important, because the
ball valve has to be in the right position.
He advises: “don’t install the ball valve until the sealant of the skin fitting is fully cured. To install the ball valve I apply the same sealant on the thread of the skin fitting as I have used for the installation of the skin fitting into the hull. As an alternative you could also choose to seal the skin fitting with epoxy.” With exactly the right amount of sealant on the thread of the protruding skin fitting a watertight seal is guaranteed. Make sure that the ball in the ball valve is not in contact with the sealant.
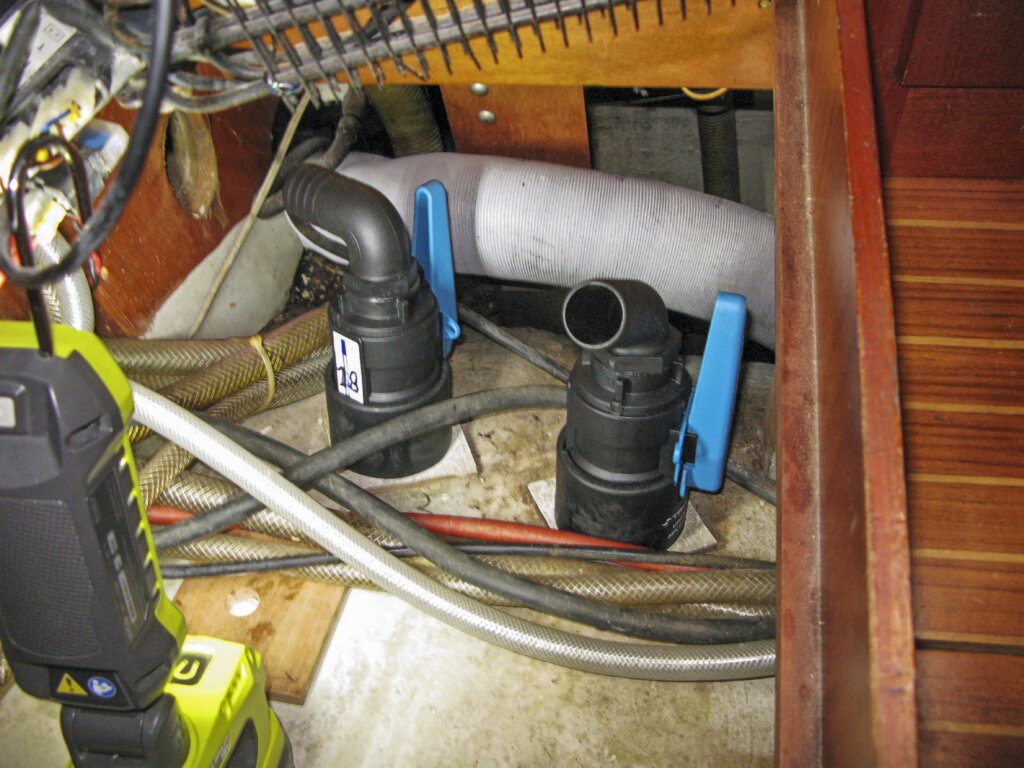
After that, Rudolf places the load-bearing collar under the ball valve and tightens both of them until the collar presses against the hull firmly. Again, he monitors the time it takes for the sealant to cure before installing the hose-tail or any other part. “This takes extra time, but it assures that the skin fitting and ball valve are installed well and thus safe. Because of the composite material, I no longer have to worry about galvanic corrosion.”
By now, all ball valves and skin fittings have been replaced. In hindsight, the job wasn’t too complicated. “The dry run of the installation, marking the position of the skin fitting and the ball valve was a bigger job than I expected, but it is one of the most important steps in the whole process to achieve an optimum result.” And all the effort was worth it: the Hallberg-Rassy is relaunched with confidence.
Off to beautiful and safe voyages!
Cost of composite skin fittings and ball valves
Heads
Toilet inlet € 92,30
Toilet outlet € 106,10
Sink outlet € 80,50
Shower outlet € 80,50
Galley
Sink outlet € 92,30
Footpump € 80,50
Engine
Cooling water intake € 126,80
Cockpit
Outlet € 175,35
Outlet € 175,35
Sealant
Two units € 23,00
TOTAL € 1.032,70
This article has been commissioned by Rosch Marine. Visit their website for more information about the composite skin fittings and ball valves by Trudesign and select the nearest distributor. For additional technical advice, please send an email to:
info@roschmarine.nl